


I've been promising this post for how long now?? Never mind, don't tell me...
So, ahem, *cough, cough*, yes I was a little tardy in getting the pictures taken, but I have them here today! So without further ado, here is a step-by-step tutorial on how to sprout grain for your livestock. Whether you have 3 backyard chickens, or a herd of dairy cattle, this idea offers some unique savings and other benefits. And best of all? It is WAY easier than you think. :)
First off, what do you need to get started? Hang on to your hats folks, because I have a really technical list.
Two 5-gallon buckets
7-14 black plastic gardening trays (these measure 11"x21")
Wheat or barley (whole, and from your local feed store)

No one fainted at the sight of the expensive list, did they? Oh good.
You certainly don't have to use the black plastic trays that I have listed, but they really are the *perfect* size for this. you can fit exactly one pound of soaked grain in them, which will yield roughly 8 lbs. of fodder (I've been getting some 9+ pounders lately!). Most Wilco's, Tractor Supplies, and gardening stores will have these trays and they may or may not have pre-drilled holes in them. If you find trays that already have holes, then consider yourself lucky and know that I am jealous. All my local Wilco has are the solid bottomed ones... If you too have solid bottom trays, then prepare yourself for an afternoon of drilling! I drilled holes roughly every 1/2 inch and only on the lower grooves of the tray. Long, tedious work... Or at least when you have a heavy battery powered drill!
You need between 7 and 14 of these trays; depending on how much you want to sprout. If you only want to be harvesting 8 lbs. of fodder a day, then you'll do fine with filling one tray each day, and thus only need 7 of these things. If you want 16 lbs. of fodder, or two trays worth each day, then you need 14 trays. Obviously, if you need more or less than these figures, then you simply adjust your needs and numbers accordingly.

You may have noticed in the first picture that the bucket on its side had holes in the bottom of it. This is your draining bucket, so once you're done drilling holes in those black trays, get ready to drill more holes in a 5-gallon bucket!!

Now it's time to get down to business. With sprouting, there are two basic rules to this thing: Keep it wet, keep it draining. You can sprout grain any way you can possibly imagine, just make sure that the grain stays wet and draining at all times!
So you have your buckets, you have your trays, and you should have your grain now. Barley is the absolute BEST grain for sprouting (highest yield, highest nutrition, easiest to grow), while wheat is an extremely close second choice. I'm currently sprouting wheat because my feed store was out of barley... Oats are the hardest grain to sprout (bummer... such a cheap grain!), but not entirely impossible. It sprouts erratically, has a low yield (I think I got 3--4 lbs. per lb. of grain), and a lower level of nutrition compared to barley/wheat. You don't need any fancy grains, just tell the the feed store folks that you want whole grains for livestock consumption.
Okey dokey, so assuming you would like to sprout one tray of fodder a day, grab yourself a quart sized mason jar and fill 'er up. This should be pretty darn close to a pound, and even if it's a bit under or over, that's okay. If you want to sprout 2 trays a day, then get 2 scoops of grain. You see where I'm going with this? Three trays equals three scoops, four trays equals four scoops... I think you probably get it.

Now, dump that there pound of grain into your 5-gallon bucket that DOES NOT have holes in it. It's just too hard to keep water in a bucket that has holes in it, so I really wouldn't recommend trying to soak your grain in your second bucket which is riddled with them. (I tease; I'm a teaser)
Cover the grain with a doubled amount of water and let it sit for 12 hours.

Once 12 hours have passed, THEN you get to pull out your holey bucket (notice the 'E' in there... No I did not say your "holy bucket"). I keep my draining bucket propped up on two bricks to aid in drainage.

Pour your bucket of water and soaked grain into the drainage bucket and let 'er rip.

When all the water has drained out, you will be left with plump-looking, squishy grain.
You can do two different things now: You can either pour the grain into your plastic trays and begin sprouting. Or you can leave the grain in the draining bucket for 12 hours with a second bucket stacked inside. Put a couple pounds-worth of water into the second bucket to act as a weight. I think this step gives you a bit of a better germination rate, but I'm not positive on that.

Either way, you'll eventually get to the step where you put the grain into the trays. If you have soaked more than 1 lb. of grain, then you just have to eyeball the amounts to divide into each tray. Rule of thumb though, is that you don't want the grain to be any deeper than 3/4" in each tray. Too shallow, and the grain will dry too quickly. Too deep, and it will rot.

Once the grain is in the trays, your job is to water it thoroughly 2-3x's each day. I'm finding that with this cool, damp weather that we've been having lately, I can easily get away with watering only twice a day. If temps are still in the 70's and up for you, then you need to water 3x's a day. if the grain dries up, then you have yourself a botched batch on your hands.
When I first started sprouting, I kept my trays in the barn. Sprouts don't need direct sunlight, and mine did really well in there. I had an old crib side (so many uses for those things!) that I stacked on top of some old 3.5 gallon buckets, and this became my sprouting area. The crib side allowed free drainage for the sprouts whenever I watered them, but still kept them up off the ground. However, I had to stop doing that a couple weeks ago since the sparrows started mutilating my little crop!!! I kept the grain loosely covered with empty feed bags, but that still wouldn't stop those pesky birds. Grrr.
So plan B. Our raised garden beds are pretty much empty this time around, so I am simply laying some clear plastic over the tops, and keeping my sprout trays inside there. It works nicely since the soil still allows good drainage, and I think I'm getting better yields since the roots are able to wiggle their toes into soil for a short spell.

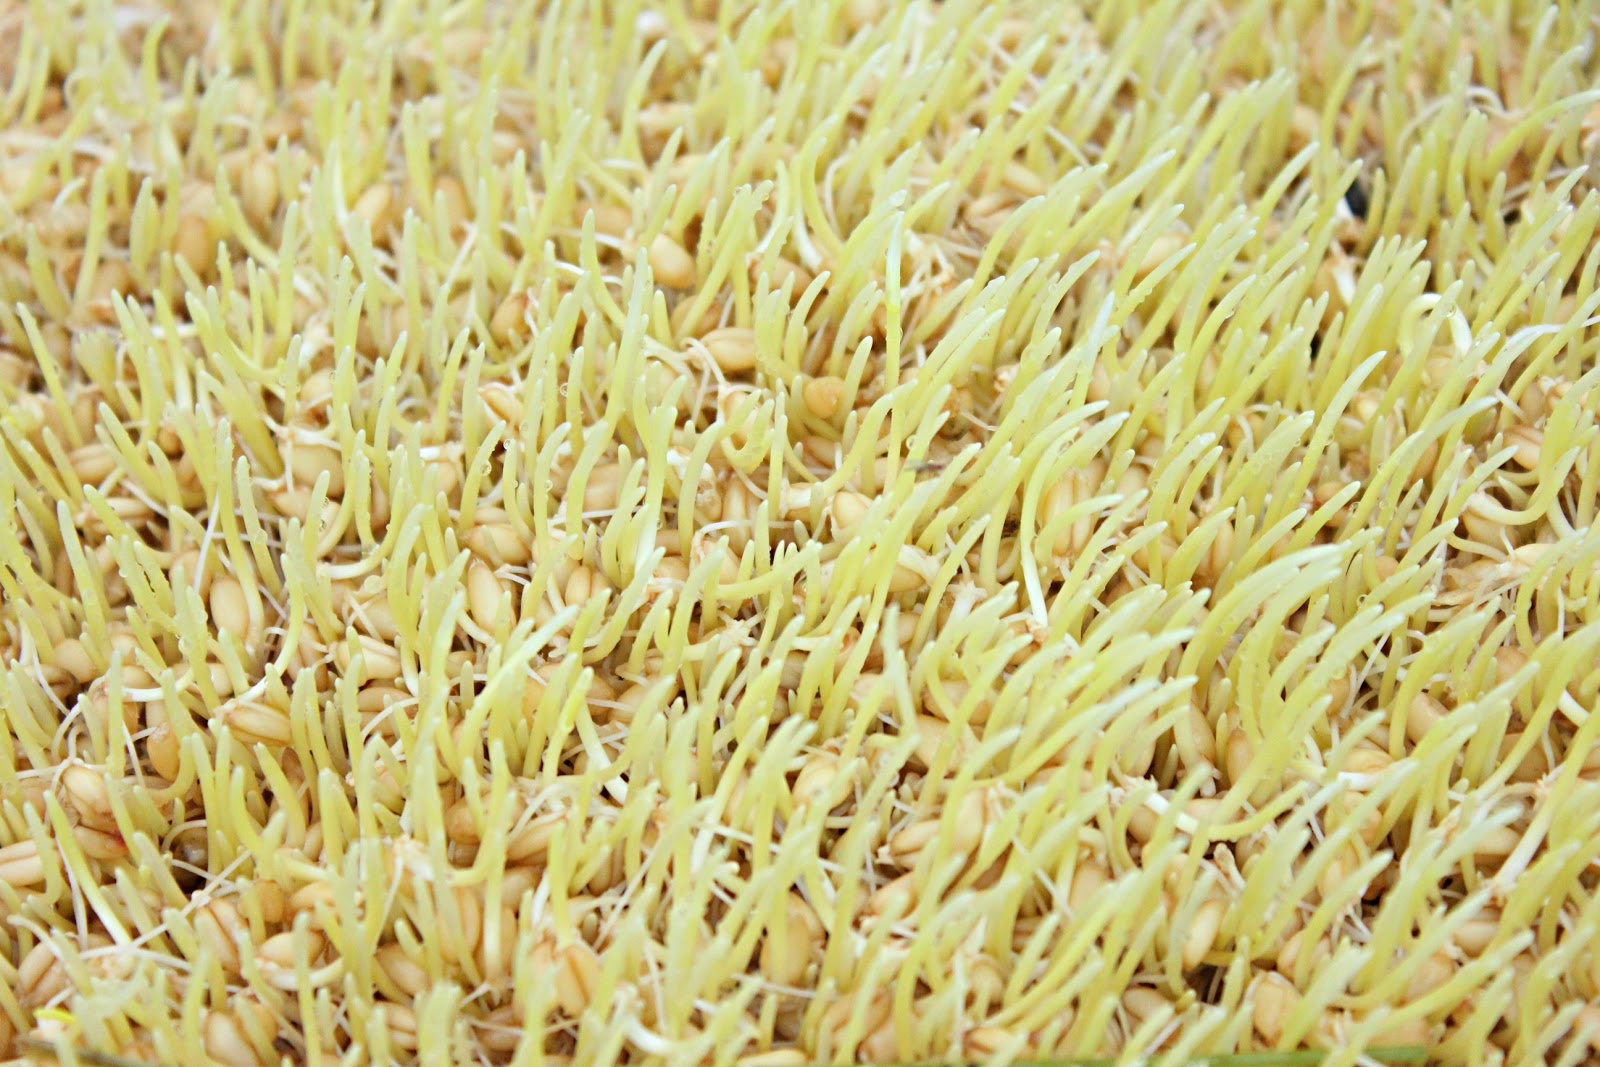
Your sprouts won't look very impressive for the first 3 days. If you look closely you'll see tiny white threads emerging, but it's not until the 3rd or 4th day that you realize that something is happening here... You're growing fodder!
 |
| Day 3--4 |
 |
| Day 3--4 |
Once you reach that halfway point where your tray looks like a sea of octopus tentacles, the sprouts take off and grow like -- well -- weeds.
 |
| Day 5 |
 |
| Day 5 |
 |
| Day 6 |
By day 7 or 8, you will have a magnificent tray of sprouts before you, and it will look something like this:

During warm/hot weather, you may have sprouts that are ready by 6 days and can be up to 5-6 inches tall, but I find that in cold weather it takes about 8 days before it's ready and will only be 3-4 inches tall. There's no exact rule as to how long you need to wait before feeding, so just go with a gut instinct on this (or how quickly you need fodder!).

Here's a side shot to show you what it looks like. You can see the sprouted grain in the middle, while the roots are all a tangled web beneath it. Yes, you feed the entire thing; roots and all!

Another look at the root mat...

When feeding sprouts to poultry, I like to shred it up like in the picture below. I find that the birds have an easier time eating the whole plant, whereas if it's in clumps then they may only peck the empty grain shells and leave the greens.
If the sprouts are going to hoofstock, then I cut the rectangle up into chunks with a knife.

Final step: Feeding time! Peaches adores her fodder!


So there you have it. It's pretty basic and simple once you get the hang of it. Keep it wet, keep it draining, and you'll be fine.
46 comments:
I posted some info too recently, just for chickens. I'm going to try that since once the ground freezes in the winter no more green grass. Peaches looks great as usual!
Great post! Thanks for sharing. I can't wait to try it!
Heather in PA
Love this tutorial. Can't wait to try it for my chickens =)
I am completely fascinated. I am seeking alternative ways to feed my animals (chickens and rabbits) than bagged feed. It can get pretty cold in winter here... I wonder if I will be successful sprouting in a cold frame during winter months?
Great post! Thanks for sharing and my ewe lambs will thank you too!
Fantastic! I have been wondering if I could grow my own greens for our chickens recently. Thanks for the great blog. Also, I love your sense of humour and you now feature in my "Blogs To Revisit" Pinterest board! http://pinterest.com/AlishaLuxford/blogs-to-revisit/
Love Alisha
From http://handsandheartsfull.blogspot.com.au/
THANK YOU for the wonderful descriptions and pictures! I bought a barrel of organic whole barley from Larry McGil of Cascade Feeds in Waimic, OR for sprouting but wasn't sure how to go about it! Now I know...
I live in Sandy, OR at about 1,200 feet, so you know if the barley will continue to sprout in the cold weather? I was thinking about bringing it inside our sunroom for the winter but with so much watering going on I am not sure how to drain it all...
I too have raised garden beds that are available but mine are not covered, I could rig something up like a green house top I suppose, is that what you are doing? It was a little hard to tell from the picture.
Thank you again for sharing and what beautiful goats you have! I have Nubians as well and just got a polled purebred buckling and am very exicted to see if he will throw polled kids...
Farmeress Anne
Nice post
thanks for sharing..
How do you know how much to feed to each species each day? How would I calculate how much I need to grow in order to have enough for everyone each day? How well does this work in the winter?
This is a great idea. Thanks for sharing. I'm off to buy some grains for sprouting :).
So how do you water it? Spritz it with a spray bottle or dump with a watering can.
Thanks so much
Hello, lovely website and blog. I too built my own fodder system using Pizza dough trays and pvc pipe, used pump, etc. It's going good, except I have been told that the barley needs to have the hull on for it to sprout. Yours does not look like it has a hull? What type of barley to you buy for your sprouting? The hull on, even with soaking seems to add two or more days for my seeds to sprout. Thank you, Annie
@AnnieOcean, No, you don't need the hull on for sprouting grain. In the pictures I have wheat (no hull), since barley is almost impossible to get in my area due to the 2012 drought. I just go to my livestock feedstore and buy whole grain (usually wheat; if they had whole barley, then I'd get that). If you're concerned about getting grain that has a hull, you might try telling them that you need dehulled grain for feeding to livestock.
@ Tattin' Kat: For a long time I just used a hose to water my sprouts; just low pressure so as not to agitate the grain. Now I'm using an automatic fodder growing system that waters the grain for me every 45 minutes. I haven't blogged about that yet though! Whoops!
@Anonymous: You would feed the fodder in the same amount as feeding grain. You might try looking in some livestock books for a feeding chart that tells how many lbs. of grain are needed per 100lbs. of animal. Each tray of fodder is going to average 6-8 lbs., so if you have an animal that needs 8 lbs. of grain a day (what my Jersey cow needs), then you would need 1 tray of fodder each day.
Growing fodder in the winter really depends on your area. I live in the Willamette Valley in Oregon and winters here are extremely mild. But putting my fodder in a greenhouse/coldframe I can keep it going pretty well (it usually take an extra few days though before it's ready to harvest). I'm experimenting with keeping the fodder in the barn where I've always had it, but shining a white-bulb heat lamp on it to give it light/heat. I don't have any info to share on that experiment though, as my bulb just broke so now I need to get a new one! :-/
This is so clear and concise! Thank you SO much! Starting this for this year for chickens and meat cows!
Wondering, do you give the fodder light the last couple of days or dark the whole time?
@ Unknown: Thanks! :)
I give the fodder light after Day #3 or 4...
I would love to hear more about your automated fodder growing system! Thanks
Thanks for a Great Tutorial! All of the photos really helped and I Love your sense of humor :-)
I am Pinning this! Probably share it with my chicken group on FB too.
I was wondering if you have wethers you feed the fodder to. I am considering trying this for my Pygora goats, but am concerned about urinary calculi in the males. I have always been told to keep the calcium to phosphorous ratio at 2 calcium:1phosphorous. The nutritional values of sprouted Barley I have found shows the calcium and phosphorous to be almost equal. I was thinking about adding some alfalfa sprouts to boost the calcium but cannot find the nutritional value of alfalfa or wheat sprouts. Your tutorial is awesome. Did you experiment with the heat lamp for temperature control yet? I live in Beavercreek, OR
I am just now buying what I need for sprouting fodder for my hens. Next up will be hogs, but I want to start small. Great post! Thanks, Teresa
I have visited many sites, you give the best step by step for the beginner. Thank you very much for that.
I am so excited !! I have been kicking this idea around for some time. I just couldnt find exactly step by step and you have solved the problem !! I (and my hens) thank you so very much !!! Ready Set Fodder !!!
Great tutorial! Lots of pictures. Shared w/ my facebook page
OK, I finally updated my chicken feed roundup post to include your sprouting post, and I added a section on fodder thanks to this post. I'd love to use one of your photos of the fodder (with credit back to your site of course) for the fodder section. Please let me know if I can- thank you!
Ashley Housley
Whistle Pig Hollow
http://www.whistlepighollow.com/2013/08/13/homemade-chicken-feed-recipes-soy-free-corn-free-fermented-sprouted/
HI i live in india ,from past couple of days i am learning about this fodder technology for my horses to feed.I have seen some fodder machines on internet which would cost me around 6,00,00 INR (approx:10,000 USD),this one will give around 150kg of fodder every day.
but i feel rather than buying this machine , would like to do it on my own as how you explained, the only concern at india is temperatures . Average temperature would be 35 degrees at my place.
as far as for barley it need 0nly 18 degrees.
also would like to know is sunlight is necessary for this fodder to grow.or else it can be grown in any darker place.
kindly please educate me . mail me to pavan.matli@gmail.com
looking forward for your reply.
Great post! Thank you very much. Need to sprout for layers in Michigan. Love the specific instructions on volume, time, etc. Good stuff.
Hello, lovely website and blog. I too built my own fodder system using Pizza dough trays and pvc pipe, used pump, etc. Bajra Cultivation
Do chickens need anything else for a balanced diet besides fodder, oyster shell, and grit?
Thanks
Nikki
Jewell0000001@aim.com
Hi there! Thanks for the detailed post, I like the idea of using a mason jar to measure out the grain. I wanted to ask you though about any special steps that you might take in the hot months. I live in southern Idaho and I have had terrible luck with barley in the summer (as it is a cold loving crop) and it inevitably molds and refuses to sprout. I have tried growing outside, in the barn and in the house. They sprouted in the house, but mold got to them pretty quickly.
Any ideas?
This sounds great! My only question is...How much of this per feeding for each goat? Would you feed it by the lb. to each goat?
I have 16 Angora goats and I feed am and pm. Also I live in northern Nevada and hay and goat feed here is pretty expensive. The goat feed is $19.00 for 50 lb. bag and this year hay is $225 a ton for alfalfa/grass mix.
Thank you the wonderful tutorial!
Thank you for this post. It was just what I was searching for. I enjoy all your posts. I have a question. Are you sure a quart is one pound of grain? I weighed some wheat I had on hand and a quart is about 2 pounds. So from that, a pound makes about 4 pounds of sprouted fodder. Still that is very exciting!
We tried to grow Barley fodder but had mold problems with all the batches. We read that it was because of dirty seed. We tried to grow on our enclosed back porch with plant heat mats, without heat mats and in our basement with a heater and a fan. Do you have any ideas as to what I'm doing wrong. Maybe I just need to get some new seed. It doesn't seem like you need to keep yours warm to grow? Is that right? Maybe I'm going about this all wrong. What are you thoughts. According to everyone that writes about fodder, this is suppose to be easy. :0/
Dear Mckitrick family moments, although I'm writing to you from Somalia in which we have warmer climates than you, I would like to share some secrets not regularly shared by fellow fodder growers across the globe. First of all, mold is everywhere other than sterilised surfaces. Mold thrives in warm and damp conditions. A few things has helped me a lot. #1 Bleach or Vinegar #2 Keeping an eye on humidity levels #3 Thoroughly cleaning trays and buckets before the next use with 1:1 bleach and water.
When you are soaking your grains in the initial stage clean the container you are using with a 1:1 solution of bleach/vinegar and water. You don't need that much but enough to cover all the surface. The easiest way is to keep the solution in spray bottle and spray it on the bucket and trays.
Wash your grains in 1 part bleach and 10 parts water solution (10% bleach/vinegar solution) and let it soak in that water after you've cleaned it. The water must be clear while you let the grains sit in there for 30 min to 12 hours. The soaking period depends on your experience with the grain as some will swear by 30 min only others will say 12 hours while the rest will say "no 24 hours is needed".
Try it out and let us know if you notice any improvements. If I've missed any steps here hopefully the others will fill in or even correct me if I'm off.
Mohamed
Hargeisa, Somalia
I just built an unheated green house. Plan to create some cold frames too. Although we get lots of sun and mostly 40s to 50s day here in Rocky Ford CO. It still gets temps in single digits at night in winter, like now. Real feel in minus some nights. Can I sprout fodder in green house, my greens do feel the cold. Cold frame or wait till nites stay warmer and start outside?
Thank you very much for your very detailed post. You have convinced me to try this! I've been undecided for a while, but you make it seem so easy & economical. - The Rambling Boho
Maybe y'all can help...I'm having trouble with flies and fruit flies getting in and hanging around. What can I do to deter them?
Is nutrient solution not needed? Thanks for the helpful blog
I just came across your blog, and wanted to drop you a note telling you how impressed I was with the information you have posted here. I'm a trader, so I want share with you all on here on how I got my loan from a professional loan lender who works with a reputable loan company and they granted me a loan of 450,000.00 Euro to finance my business with 2% rate interest return so I want anyone here to know about Mr Pedro loan professional loan officer just in case you need a financial help then you can contact Mr Pedro Email on pedroloanss@gmail.com! Keep up the great work, you are providing a great resource on the Internet here!
Thanks for sherring. Great post .
Thanks.I got it. Now i am ready to begin. Thanks again for such informative article.
Naturehydro is your trusted partner in providing cutting-edge hydroponic microgreen fodder system designed to revolutionize the way you feed your livestock. Our innovative solutions are tailored to meet the nutritional needs of your animals while streamlining your farming operations for maximum efficiency.
It is the best explanation I have read about this process and I am reading no further. My question however is, can I use Maize or corn for Mt backyard chicken? Barley seems not to be common in my country. What if I use millet?
HydroFodder is an advanced hydroponic technology designed specifically for cultivating fodder crops, providing a high-quality feed source for farms and animal fodder system operations.
Anyone have a solution for gnats or fruit flies? Should I cover them with a clear plastic cover?
Post a Comment